Setting up your Discord account
On this page, we'll run you through all the steps to get started building your first Discord bot!
Create a Discord account
If you have a Discord account already, skip to the next section.
To make a Discord account, go to the registration page, and fill out your details.
to use discord you need to be 13+
Discord's Terms of Service requires that its users be over the age of 13 in Australia. If you are making your own account, you should be careful about what age you give Discord. Ask a mentor to borrow a Discord account we've made already, if you need one.
join your first server
Hey, now that you have a Discord account, why not join the CompClub Community Discord Server? It's a way to meet other people your age that are interested in computing, and to get help from our team of passionate mentors. Ask a mentor for more information about the server.
Enable Developer Mode on your account
When you're writing the code for your application, in order to reference a particular user, channel, server, etc. you'll have to refer to it by its ID.
For example, the guild ID for the CompClub Community Discord Server is 931142171032186900.
Most users who don't care about the API, they will never use these IDs.
But it will be essential that you can see them.
To see these IDs:
-
Open Discord
-
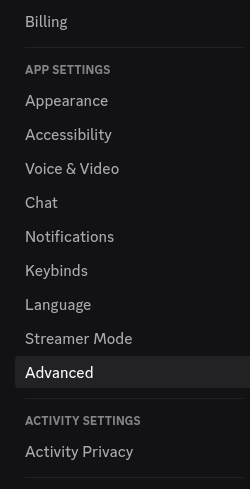
Go to your settings. You can do so by clicking on the cog icon in the bottom-left of the screen.
-
Open the "Advanced" tab of the settings.
-
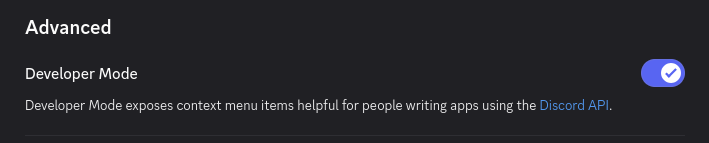
Toggle the setting named "Developer Mode" (you're a Developer now!)
success
Test that you got this working by right-clicking any server you are in. In the pop-up menu, there should now be an option labeled "Copy Server ID". This will work when you right click on any message, user, or channel!
Registering a Bot application
Now that you have a Discord account and have enabled Developer mode, it's time to register a Bot application. Essentially, you are creating an account for your bot.
Create a Discord server
Once you've gotten setup, find a group of around 4-5 people around you and get one person to make a new server for you and your discord bots. A server is basically like a group chat, but you can fit a lot more people into it. To create one,
-
Find the
+button at the bottom of your server list on the very left. -
Select
Create My OwnandFor me and my Friends. Give it a name, and optionally a nice picture. -
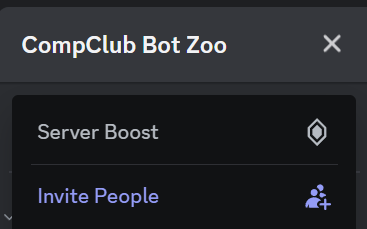
Once you're in the server, find the invite link by clicking on the downwards arrow on the server name and finding
Invite Peoplelike so:
- Send everyone in your group the invitation link!

Once they follow it, you should see everyone join the server, with messages appearing in the #general channel.
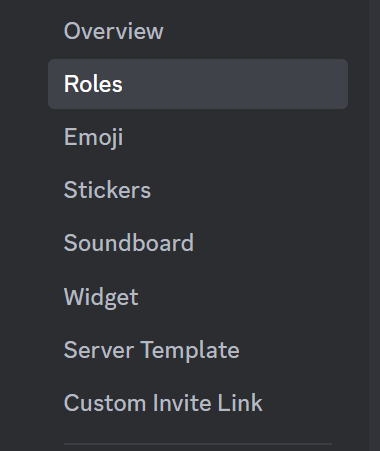
Roles
On a discord server, roles let you sort people into categories, and decide which groups of people you want to give permissions to.
Let's make an admin role to allow everyone to invite their own bots!
- First, find
server settingsin the same dropdown that the invite link was in. - Find the
rolestab on the options to the left!
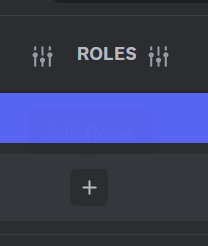
-
Create a new role, and scroll to the bottom of the
permissionstab until you findadministrator, and tick the button. Don't forget to save your changes! -
Now look back on the bar to the left and find
membersnear the bottom.
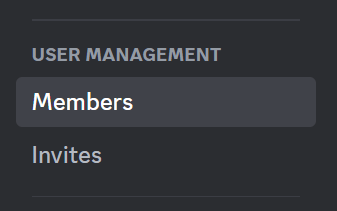
You will find a list of all the members of your server! Give everyone the role you just made by finding the + button next to their name.
Awesome! you're all set to move onto the next step.