Introduction to JavaScript
This will guide you through the basics of javascript. Complete the tasks at your own pace!
To get started, press the right arrow button and follow the setup guide in section 1.1.
useful resources
Day 1 slides links: https://go.compclub.org/winter-day-1
not sure? ask!
Mentors are here to help you! We'd rather you ask a question than be struggling on something for way too long.
Part 1: Setting up your environment
Welcome to Day 1 of CompClub's winter workshops ☃️❄️!! Today you'll be putting all that you learnt about JavaScript in the lecture slides into practice!
- You should have two apps open - a web browser and visual studio code (vscode)
tip
You can switch between these applications in the top left of your screen!

-
Click on
exercises.jsin visual studio code (has the blue icon) -
Press the buttons
ctrl + sto save the file. Make sure you save regularly as you work! Vscode tells you that you have unsaved changes when there is a white dot next to the file name, like so:
-
Get started! Click the right arrow button on this book 🐧
tip
You can change the theme of this book by clicking the paintbrush icon in the top middle!
Part 2: Fundamentals of JavaScript
In this part you will learn to:
- Write your own comments and print to the terminal
- Create and change variables
- Use different data types
- Use arithmetic and assignment operators
Part 2.1: Hello World!
comments
Let's start by writing our very first comment! Comments are not run as code, and are instead used by programmers for you and others to read and understand your code easier.
// This is a single line comment!

/*
This is
a multiline
comment!
*/
printing to the terminal
How do we see what we're doing in code? Printing! In JavaScript we use console.log() to achieve this.
Just put whatever you want to print in between the brackets. Printing is useful for finding the cause of errors (also known as debugging 🐛) and for monitoring code execution.
// prints Hello World! to the terminal
console.log("Hello World");

// prints 50 to the terminal
console.log(50);
running your code
-
Open the terminal in vscode by pressing
ctrl + `or by looking at the top middle of vscode for the button that says terminal → new terminal -
Type the command
node exercises.jsin the terminal and pressenter -
You should be able to see what you've printed! Ask a mentor if you're having trouble running your code.
tasks
- Write some comments in your
exercises.jsfile - Print some things to the terminal using
console.log() - Run your file!
Part 2.2: Variables
declaring & reassigning variables
You can also create variables in javascript with their own names. These are used everywhere in programming to store values. Some variables can be changed later on as the context of your code changes. Refer to the slides to see the main reasons they're used!
// There are two main ways to declare a variable in javascript

// Constant variables
const unchanging = 1;
unchanging = 5; // will throw an error

// Mutable (changeable) variables
// The name of the variable here is planet, and the value is "earth".
let planet = "earth";
planet = "jupiter";
printing variables
You can print your variables with console.log(). You can combine this with reassigning variables
to print different messages.
let message = "Hello World!";
console.log(message);

message = "I love CompClub!";
console.log(message);
question
There are some words you cannot use as variable names. Do you remember what these are? You can refer to the slides if you don't remember!
tasks
- Create two different types of variables with your own names and values
- Print your variables to the console
- Change the value of your variables and print them before and after the change
- Run your file!
- Make sure you save your code with
ctrl + s!!
3 - Data Types
In this part you will learn about:
- Strings
- Numbers
- Booleans
- Extracting the type of variables
On top of strings, numbers and booleans, there are 5 other data types that JavaScript has mentioned in the slides!
why do we need data types?
In programming, data types are an important concept. You can get some strange behaviour in computers when you combine data types, so most languages throw errors if you combine 2 different data types. JavaScript does not throw these errors, but that doesn't mean you shouldn't care about mixing data types! Instead of this:
let x = 123 + "chicken"; //bad!!!
You should have:
let x = "123" + "chicken"; //good :D
3.1 - JavaScript Strings
strings
A string represents textual data. It contains a sequence of characters. For example, "hello", "JavaScript", etc. In JavaScript, strings are surrounded by quotes:
// string enclosed within single quotes
let fruit = "apple";
console.log(fruit);

// string enclosed within double quotes
let state = "NSW";
console.log(country);

// string enclosed within backticks
let result = `success`;
console.log(result);
mismatched quotes
You cannot mismatch quotes in strings. For example, the strings 'hello" and "world' are enclosed inside one single quote and one double quote, which results in an error.
string methods
You can do a whole bunch of things with strings as well! Here are some examples:
// string.length() returns the length of the string
let fruit = "apple";
console.log(fruit.length); // prints 5

// string.toLowerCase() returns the string in all lowercase letters
let state = "NSW";
console.log(country.toLowerCase()); // prints nsw

// string.concat() combines 2 strings together
let descriptor = "super";
let result = "success!";
console.log(descriptor + result); // prints super success!
You can see a full list of string methods with this link: https://www.w3schools.com/java/java_ref_string.asp
tasks
- Create some variables that contain strings
- Use 3 different string methods on them. Then
console.log()the result.
3.2 - JavaScript Numbers
numbers
In JavaScript, the number type represents numeric values (both integers and floating-point numbers).
- Integers - Numeric values without any decimal parts. Example: 3, -74, etc.
- Floating-Point - Numeric values with decimal parts. Example: 3.15, -1.3, etc.
// Integer value
let integer_number = -3;
console.log(integer_number);

// Floating-point value
let float_number = 3.15;
console.log(float_number);
too large!
Numbers are restricted in how large they can be.
let numApples = 9999999999999999; // y will be 10000000000000000
let numBananas = 999999999999999; // x will be 999999999999999
tasks
- Create some variables that a variety of numbers - be sure to have at least one integer and at least one floating point!
3.3 - JavaScript Booleans
booleans
A Boolean data can only have one of two values: true or false.
let isRaining = true;
console.log(isRaining); // true

let isWeekend = false;
console.log(isWeekend); // false
These will be extremely useful when you get to conditionals in part 1.5!
tasks
- Create a boolean variable!!
3.4 - What's that type?
checking variable types
Using typeof on a variable returns the data type associated with the given variable.
console.log(typeof "Poco"); // String
console.log(typeof 420); // number
console.log(typeof true); // boolean
console.log(typeof x); // undefined - we haven’t given x a value
knowledge check
What are the data types for each of these variables?
let cat = "black";
let numBats = 12;
let poisonProb = 0.5;
let isPumpkinOrange = true;
tasks
- With the variables you just created in parts 3.1, 3.2 and 3.3,
console.log()the type of them.
Operators
In this part you will learn about the different types of JavaScript operators. The primary types of operators, you'll encounter are:
- Arithmetic Operators
- Assignment Operators
- Comparison Operators
- Logical Operators
4.1 - Math with Arithmetic Operators
arithmetic operators
There are multiple ways we can operate on numbers, just like in math!
| Operator | Meaning | Example |
|---|---|---|
| + | Addition: Adds two values | let add = 250 + 170; |
| - | Subtraction: Minuses one value from another | let sub = 500 - 80; |
| * | Multiplication: Multiplies two numbers | let mul = 5 * 8; |
| / | Division: Divides one number by another | let splitCandy = 100 / 12; |
| % | Modulo: Returns the remainder of dividing one number by another | let leftOverCandy = 100 % 12; |
the modulo % operator
The modulo operator is a little complicated when first seeing it, but once you understand that it's all about remainders, it's not so bad!
x = 21;
console.log(x % 4); // 21 ÷ 4 = 5 remainder 1, so this will print 1
Another big use for the modulo operator is by checking whether a number is odd or even. We can do this by doing x % 2 - an odd number has a remainder when divided by 2, whilst an even number has no remainder!
your turn: arithmetic operators task
- Create two number variables
x, yand set it to any value you like! - Print the value of x added to y
- Print the value of x and y multiplied together
- Print the value of x divided by y
- Print the remainder when x is divided by y
4.2 - Assignment Operators
assignment operators
| Operator | Meaning | Example |
|---|---|---|
| = | Equals: Assigns a value | x = y |
| += | Plus Equals: Assigns the original value plus the new value | x += y // x = x + y |
| -= | Minus Equals: Assigns the original value minus the new value | x -= y // x = x - y |
| *= | Multiply Equals: Assigns the original value times the new value | x *= y // x = x * y |
| /= | Divide Equals: Assigns the original value divided by the new value | x /= y // x = x / y |
| %= | Modulo Equals: Assigns the original value modulo the new value | x %= y // x = x % y |
| ++ | Increases the variable by 1 | x++ |
| -- | Decreases the variable by 1 | x-- |
code examples
x = 10;
x += 3; // shorthand for x = x + 3
console.log(x); // should output 13 since 10 + 3 = 13

x = 10;
x /= 5; // shorthand for x = x ÷ 5
console.log(x); // outputs 2, since 10 ÷ 5 = 2

x = 10;
x++;
console.log(x); // outputs 11, since 10 + 1 = 11
assignment operators
- With your existing number variables, apply some assignment operators to them.
console.log()the output of your variables after applying these operators!
4.3 - Comparison Operators
comparison operators
Comparison operators are used in logical statements to determine equality or difference between variables or values.
Given that x = 5, the table below explains the comparison operators:
| Operator | Description | Comparison |
|---|---|---|
| === | equal to | x === 5 (true) |
| !== | not equal | x !== 8 (true) |
| > | greater than | x > 8 (false) |
| < | less than | x < 8 (true) |
| >= | greater than or equal to | x >= 8 (false) |
| <= | less than or equal to | x <= 8 (true) |
triple equals sign
In JavaScript we use the triple equals sign (===) instead of double equals sign (==). This is called strict equality and is used for checking that both sides have the same type.
your turn: comparison operators task
We have these two variables:
let sweetCandy = 100;
let sourCandy = 150;
Find the answers to these questions using JavaScript comparison!
- Is the number of sweet candies greater than the number of sour candies?
- Is the number of sour candies less than or equal to the number of sour candies?
4.4 - Logical Operators
logical operators
Logical operators are used to determine the logic between variables or values.
Given that x = 6 and y = 3, the table below explains the logical operators:
| Operator | Description | Example |
|---|---|---|
| && | and | (x < 10 && y > 1) is true |
| || | or | (x == 5 || y == 5) is false |
| ! | not | !(x == y) is true |
your turn: logical operators task
- Create two boolean variables
isRainingandhasRaincoatand set them to eithertrueorfalse. What you pick is up to you! - Print the value of
isRaining AND hasRaincoat - Print the value of
isRaining OR hasRaincoat - Print the value of
NOT(isRaining AND hasRaincoat)
Conditionals
In this part you will learn about
- If, else if and else statements
- Switch statements
5.1 - If, Else If, Else
if statements
Use the if statement to specify a block of JavaScript code to be executed if a condition is true.
if (condition) {
  //  block of code to be executed if the condition is true
}

// make a "Good day" greeting if the hour is less than 18:00:
hour = 19
if (hour < 18) {
  greeting = "Good day";
  console.log(greeting);
}
javascript is case-sensitive
Note that if is in lowercase letters. Uppercase letters (If or IF) will generate a JavaScript error.
else if statements
Use the else if statement to specify a new condition if the first condition is false. Remember that if statements apply sequentially, so following conditions will only run if the previous conditions are false.
if (condition1) {
  //  block of code to be executed if condition1 is true
} else if (condition2) {
  //  block of code to be executed if the condition1 is false and condition2 is true
} else {
  //  block of code to be executed if the condition1 is false and condition2 is false
}

// If time is less than 10:00, create a "Good morning" greeting,
// Otherwise, if the time is less than 20:00, create a "Good day" greeting
// Otherwise, create a "Good evening" greeting:
time = 15
if (time < 10) {
  greeting = "Good morning";
} else if (time < 20) {
  greeting = "Good day";
} else {
  greeting = "Good evening";
}
else statements
Use the else statement to specify a block of code to be executed if the condition is false.
if (condition) {
  //  block of code to be executed if the condition is true
} else {
  //  block of code to be executed if the condition is false
}

// if the hour is less than 18, create a "Good day" greeting
// otherwise the greeting is "Good evening":
hour = 10
if (hour < 18) {
  greeting = "Good day";
} else {
  greeting = "Good evening";
}
order
If, else if and else statements must be in order. You must start with an if statement, else statements must be at the end. Else if statements should go just after if statements.
your turn: conditionals task
Set your favorite color in the variable below then use conditionals to print a message:
let favoriteColor = "red"; // try changing this to blue, green, etc
- If the color is Red → print
Roses are red - If the color is Blue → print
The sky is blue - For any other color → print
That's a cool color!
5.2 - Switching it up!
this exercise is optional
switch statements
A switch statement allows you to execute different blocks of code based on the value of a variable. It’s an alternative to using multiple if else statements when you’re checking one variable against several possible values.
How it works:
- The switch expression is evaluated once
- The value of the expression of compared with the values of each case
- If there is a match, the associated code black is executed
- If there is no match, the default code block is executed
switch (expression) {
  case x: // If expression === x
    // code block
    break;
  case y: // Else if expression === y
    // code block
    break;
  default: // Else
    // code block
}
code example
let weather = "Sunny";

if (weather === "Windy") {
  console.log("Wear a jacket!");
} else if (weather === "Rainy") {
  console.log("Bring an umbrella!");
} else if (weather === "Sunny") {
  console.log("Put sunscreen on!");
} else {
  console.log("Unknown weather");
}
Is equivalent to:
// check the value of the weather variable and execute different code
// based on which weather it is
let weather = "Sunny";

switch (weather) {
  case "Windy":
    console.log("Wear a jacket!");
    break;
  case "Rainy":
    console.log("Bring an umbrella!");
    break;
  case "Sunny":
    console.log("Put sunscreen on!");
    break;
  default:
    console.log("Unknown weather");
}
break statement
When JavaScript reaches a break keyword, it breaks out of the switch block. If you omit the break statement, execution will continue to the next case regardless of whether its condition matches.
default case
The default keyword specifies the code to run if there is no case match. It is not necessary to break the last case in a switch block since the block breaks ends there anyway.
your turn: switch task
Rewrite this if...else if chain using a switch statement
potion = "healing"; // try changing this to other values
if (potion === "healing") {
  console.log("Restores health!");
} else if (potion === "invisibility") {
  console.log("You disappear!");
} else if (potion === "strength") {
  console.log("You feel powerful!");
} else if (potion === "poison") {
  console.log("Ouch! Toxic!");
} else {
  console.log("Unknown potion!");
}
Loops
Loops let us execute a block of code repeatedly. They are useful for tasks that require repetitive actions such as going through an array or performing an action multiple times.
In this part you will learn about:
- While loops
- For loops
- For...in loops
- For...of loops
6.1 - Could you repeat that v1?
while loops
The while loop loops through a block of code as long as a specified condition is true.
while (condition) {
  // code block to be executed
}

// This loop will run, over and over again, as long as the variable i
//  is less than 10:
while (i < 10) {
  text += "The number is " + i;
  i++;
}
// Output:
// The number is 0
// The number is 1
// The number is 2
// The number is 3
// The number is 4
// The number is 5
// The number is 6
// The number is 7
// The number is 8
// The number is 9

// This loop counts down the days until winter. It runs as long as
// daysUntilWinter is greater than 0:
let daysUntilWinter = 5;
while (daysUntilWinter > 0) {
  console.log("Days until Winter: " + daysUntilWinter);
  daysUntilWinter--; // Decrease the counter by 1
}
console.log("It's Winter!");
// Output:
// Days until Winter: 5
// Days until Winter: 4
// Days until Winter: 3
// Days until Winter: 2
// Days until Winter: 1
// It's Winter!
infinite loop
If you forget to update the variable in the loop condition, the loop might never end (infinite loop). It can make your program freeze or hang because it keeps running forever.
your turn: while loop task
Follow these steps to complete the task:
- Create a variable called
startand set it to any positive number. - Create a variable called
countand set it to 0. - Create a while loop that runs while
startis greater than 0. - Inside the loop:
- Subtract 1 from start
- Add 1 to count
- Print the value of count
- After the loop finishes, print
Loop finished!
your turn: while loop task 2
- Create a variable
stepsand set it to 0. - Create a variable
nand set it to any positive number. - Create a while loop that runs while
nis not equal to 1. - Inside the loop:
- If n is even, then set
n = n / 2. - Else, set
n = n * 3 + 1. - Increase
stepsby 1
- If n is even, then set
- After the loop finishes, print the value of
steps.
6.2 - Could you repeat that v2?
for loops
A for loop repeats a block of code a known number of times. It’s commonly used when the number of iterations is known ahead of time.
for (initialization; condition; final-expression) {
  // code block to be executed
}

// This loop prints numbers from 0 to 9:
for (let i = 0; i < 10; i++) {
  console.log("The number is " + i);
}
// Output:
// The number is 0
// The number is 1
// The number is 2
// The number is 3
// The number is 4
// The number is 5
// The number is 6
// The number is 7
// The number is 8
// The number is 9

// This loop prints even numbers up to 10:
for (let i = 0; i <= 10; i += 2) {
  console.log(i);
}
// Output:
// 0
// 2
// 4
// 6
// 8
// 10
question
In a for loop, what are the three parts inside the parentheses used for? Can you explain what i++ or i += 2 means in simple words?
tasks
- Create a for loop that counts from 1 to 5 and prints each number
- Create another loop that prints out only odd numbers from 1 to 9
- Try changing the start or stop number, does the loop still work?
- Print a fun message with each number, like: "Counting... 1", "Counting... 2", etc.
6.3 - Could you repeat that v3?
for...in loops
The for…in loop iterates over the properties (keys/indexes) of an object.
When used on arrays, it returns the indexes (not the values directly).
let nums = [45, 52, 3, 5, 10, 11];

for (index in nums) {
  console.log(index);        // Prints the index
  console.log(nums[index]);  // Prints the value
}
// Output:
// 0
// 45
// 1
// 52
// 2
// 3
// 3
// 5
// 4
// 10
// 5
// 11
use case
for…in is typically used for objects. When looping through arrays, it's better to use for…of or a traditional for loop to avoid unexpected behavior.
for...in loops with objects
let person = { name: "Jamie", age: 22, student: true };
for (key in person) {
  console.log(key);          // Prints the property name
  console.log(person[key]);  // Prints the value of that property
}
// Output:
// name
// Jamie
// age
// 22
// student
// true
question
- What’s the difference between what
for...ingives you when looping through an array vs an object? - Can you explain why using
nums[index]is needed when looping through arrays?
tasks
- Create an object called book with at least 3 properties (e.g., title, author, pages)
- Use a
for...inloop to print each key and its value - Then create an array of your top 3 favourite foods
- Use a
for...inloop to print both the index and the food at that index
Bonus: Try using for...of on the array and compare what it prints!
6.4 - Could you repeat that v4?
for...of loops
The for…of loop iterates over the values of an iterable object (arrays, strings, Maps, Sets, etc.).
let nums = [45, 52, 3, 5, 10, 11];

for (number of nums) {
  console.log(number);  // Prints the value
}
// Output:
// 45
// 52
// 3
// 5
// 10
// 11
use case
Use for…of when you need direct access to elements.
If you need the indexes of an array, a traditional for loop or array.entries() is a better choice.
To iterate over object properties, use for…in or Object.keys() / Object.entries().
question
What’s the main difference between for...in and for...of?
Which one would you use if you wanted to loop over a string’s characters?
tasks
- Create an array of 5 hobbies or interests.
- Use
for...ofto print each one. - Try the same thing with a string (e.g. "hello") and print each letter.
- Try mixing it up: can you figure out how to get both index and value? (Hint: use .entries() with for...of!)
Bonus: Compare the output of for...in vs for...of on the same array!
7.1 - Functions? The math ones?
functions in programming
Functions are a useful tool where we can store code separately so we don’t have to rewrite it. This reduces repetitiveness in code, because you can just call functions multiple times!
To define a function in JavaScript:
- Use the
functionkeyword - Give it a name
- List parameters, or inputs, inside parentheses (
(…)) - Write the body between
{ … } - Use
returnto specify the output
function addNums(a, b) {
  return a + b;
}

let result1 = addNums(4, 5);
let result2 = addNums(10, 11);

console.log(result1); // 9
console.log(result2); // 21
In the above function, the name is addNums, parameters are a and b, and the body is return a + b
You can call it multiple times with different input to reuse the same logic.
question
What does the return keyword do inside a function? Can you explain the difference between calling a function and defining it?
tasks
- Create a function called greet that takes one parameter (name) and returns "Hello, [name]!"
- Call your greet function with different names and print the result
- Create a function called multiply that takes two numbers and returns their product
- Print out the result of calling
multiply(3, 4)andmultiply(7, 2)
Bonus: Try writing a function that takes a number and returns whether it's even or odd
8.1 - Basics of APIs
what are apis?
- Stands for "Application Programming Interface".
- Allows us to communicate with websites & programs we don't control.
tip
There are lots of free APIs out there! Try the following page for some.
query parameters
Query parameters come in parameter/value pairs -- We pass these to the API in order to control what it will return to us. Parameters are always strings, but values can be anything.
query parameter syntax
When writing a query parameter directly in a URL, we indicate individual parameter/value pairs with "?parameter=value", and put multiple together with "&". Some examples, with a base > URL of https://meowfacts.herokuapp.com/:
- https://meowfacts.herokuapp.com/?count=3
- https://meowfacts.herokuapp.com/?lang=ukr
- https://meowfacts.herokuapp.com/?lang=ukr&count=3 Order does not matter. The following is the same as the last example.
- https://meowfacts.herokuapp.com/?count=3&?lang=ukr
8.2 - Thunder Client
how to use thunder client
- Click the "Lightning bolt" icon on the left of your screen, past the file viewer.
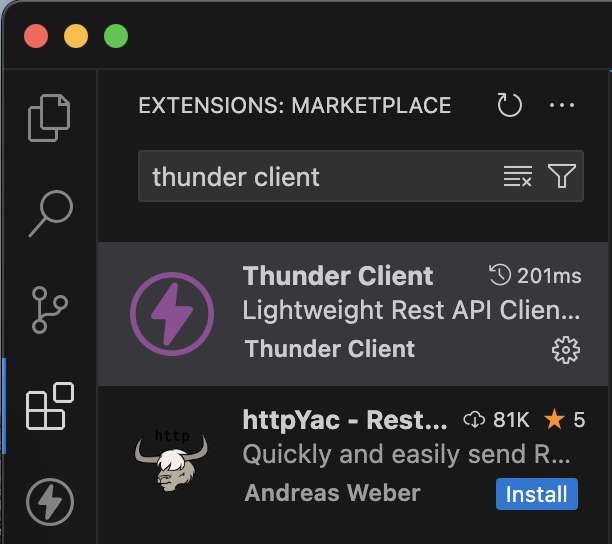
- Then, hitting "New Request" will allow you to continue using Thunder Client to do API examples.
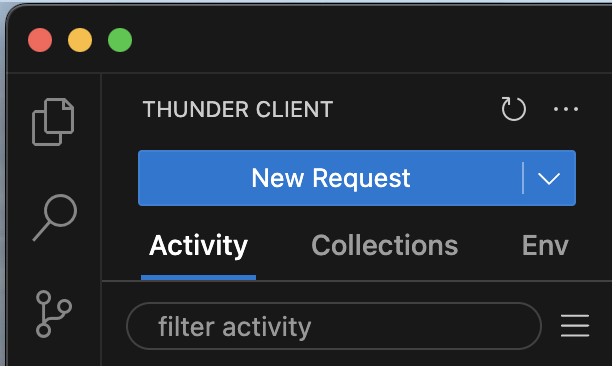
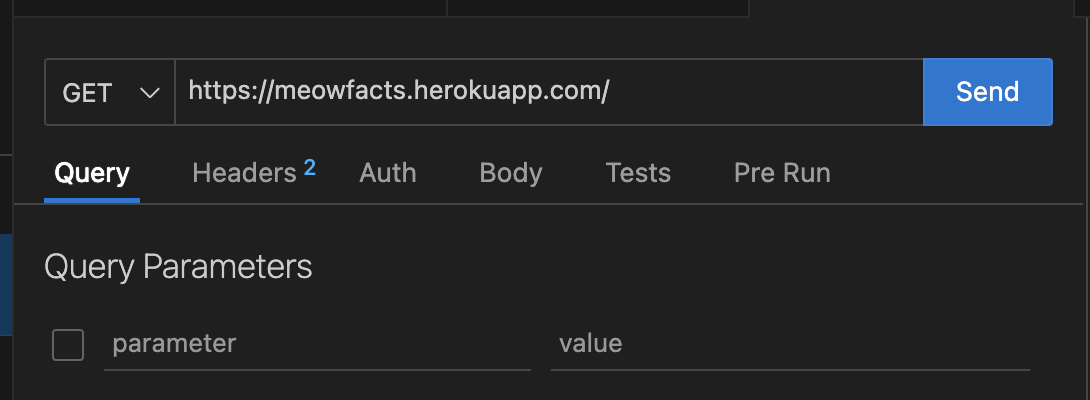
You can enter your chosen API, configure the Query Parameters, and hit "Send" to see the result from the API!
parameters
Remember to hit the checkbox next to your parameter to enable it, if it's not checked already!
inspect your data!
It's good to have a go at inspecting the data you get back from an API request. In Javascript, you may need to use array or dictionary accesses in order to fully access this data.
dictionaries & accessing them
A dictionary, written with curly braces {}, can be accessed with strings.
The dictionary
let dict = {data: "hello"}
can be accessed with dict["data"].
try it yourself
- Pick an API from the list in the API page, or use our meow facts API:
https://meowfacts.herokuapp.com/(you can find documentation here), and try various different requests to see how the API responds. - Find out what happens when you pass an API invalid query parameter. Different APIs may respond differently!
8.3 - Async
async/await
asyncis shorthand for "Asynchronous"awaitis shorthard for... "Await"
We use async and await for computations that may take a long time. In short, using these warns Javascript & the programmer that these operations may be "waiting" for a while, so we are explicitly waiting with await.
In our case, the operations may be slow because using internet APIs can be slow.
promises
All async functions, and functions like fetch, return a Promise instead of a value. A Promise is a guarantee that if you await the promise, you will get the data inside.
async function one() {
    return 1;
}
If we did:
let data = one();
data will be a Promise, instead of the data we actually want.
If instead we do:
let data = await one();
Now data will be 1.
calling `await`
If we define our own functions, we must use async at the start of the function. Otherwise, you cannot use await within the function body, as you have not warned Javascript the operation may take a long time. The following will not work:
// Doesn't work!
function googler() {
    return await fetch("https://google.com")
}
But this does, because we've added async:
async function googler() {
    return await fetch("https://google.com")
}
try it yourself
- Try writing some of the functions we explored earlier with
async. - Explore how this may require you to change other functions in order to accommodate this new
asyncusage. - Do you think this could have consequences in a large code base?
8.4 - Fetch
fetch calls
fetch is the function we use to make an API call in Javascript.
In its most simple form, we simply call fetch using await (and then await again on some of the contents, as the thing returned by fetch is quite complex and we only need a little bit of it):
let response = await fetch("https://meowfacts.herokuapp.com");
let data = await response.json();
console.log(data);
.json() converts the response from fetch into data we can use.
query parameters
To add query parameters, we need to manually add them to the URL. (See the Query Parameters page for how to do this!).
let response = await fetch("https://meowfacts.herokuapp.com/?count=3")
let data = await response.json()
console.log(data)
try it yourself:
-
Pick an API from the list in the API page, or use our meow facts API:
https://meowfacts.herokuapp.com/(you can find documentation here), and create a program that prints out different cat facts. -
Use a loop to call an API multiple times, with different paramaters each time.
-
Try combining two APIs at once, or more! How might this be useful to build a larger application?
-
Further combine APIs and the other features you've been taught to your hearts content!
automagical query parameters
There is a method of automatically adding query parameters, but it's out of scope for this course. We provide it here anyway - perhaps you could try and figure out how it works? If not, you can use it as much as you like anyway.
let params = new URLSearchParams();
params.append("count", 3)

let response = await fetch(`https://meowfacts.herokuapp.com/?${params}`)
let data = await response.json()
console.log(data)
Note the backticks ` instead of quotes ", and the question mark!
Building Discord bots with discord.js
Welcome to day 2! In this tutorial we'll go over how to setup, invite and run some basic commands on your very own discord bot.
Task 1: Hello World!
highlights
Helloo!!!!
Setting up your Discord account
On this page, we'll run you through all the steps to get started building your first Discord bot!
Create a Discord account
If you have a Discord account already, skip to the next section.
To make a Discord account, go to the registration page, and fill out your details.
to use discord you need to be 13+
Discord's Terms of Service requires that its users be over the age of 13 in Australia. If you are making your own account, you should be careful about what age you give Discord. Ask a mentor to borrow a Discord account we've made already, if you need one.
join your first server
Hey, now that you have a Discord account, why not join the CompClub Community Discord Server? It's a way to meet other people your age that are interested in computing, and to get help from our team of passionate mentors. Ask a mentor for more information about the server.
Enable Developer Mode on your account
When you're writing the code for your application, in order to reference a particular user, channel, server, etc. you'll have to refer to it by its ID.
For example, the guild ID for the CompClub Community Discord Server is 931142171032186900.
Most users who don't care about the API, they will never use these IDs.
But it will be essential that you can see them.
To see these IDs:
-
Open Discord
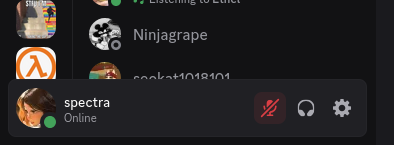
-
Go to your settings. You can do so by clicking on the cog icon in the bottom-left of the screen.
-
Open the "Advanced" tab of the settings.
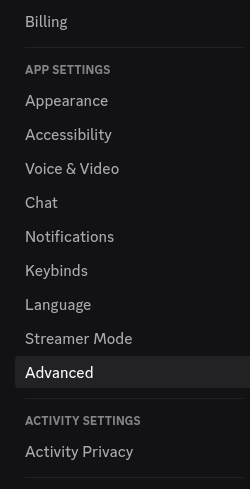
-
Toggle the setting named "Developer Mode" (you're a Developer now!)
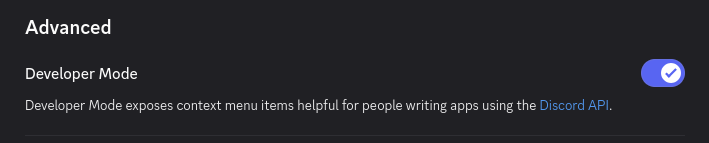
success
Test that you got this working by right-clicking any server you are in. In the pop-up menu, there should now be an option labeled "Copy Server ID". This will work when you right click on any message, user, or channel!
Registering a Bot application
Now that you have a Discord account and have enabled Developer mode, it's time to register a Bot application. Essentially, you are creating an account for your bot.
Create a Discord server
Once you've gotten setup, find a group of around 4-5 people around you and get one person to make a new server for you and your discord bots. A server is basically like a group chat, but you can fit a lot more people into it. To create one,
-
Find the
+button at the bottom of your server list on the very left. -
Select
Create My OwnandFor me and my Friends. Give it a name, and optionally a nice picture. -
Once you're in the server, find the invite link by clicking on the downwards arrow on the server name and finding
Invite Peoplelike so:
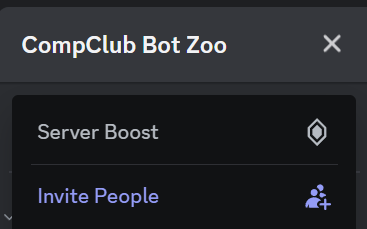
- Send everyone in your group the invitation link!

Once they follow it, you should see everyone join the server, with messages appearing in the #general channel.
Roles
On a discord server, roles let you sort people into categories, and decide which groups of people you want to give permissions to.
Let's make an admin role to allow everyone to invite their own bots!
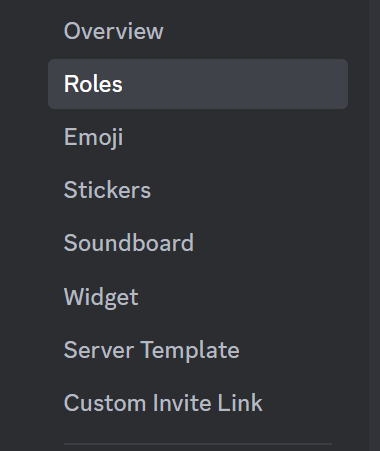
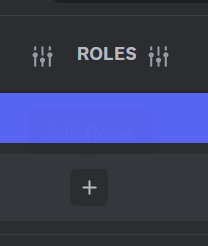
- First, find
server settingsin the same dropdown that the invite link was in. - Find the
rolestab on the options to the left!
-
Create a new role, and scroll to the bottom of the
permissionstab until you findadministrator, and tick the button. Don't forget to save your changes! -
Now look back on the bar to the left and find
membersnear the bottom.
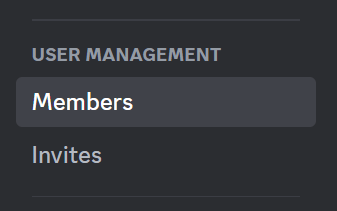
You will find a list of all the members of your server! Give everyone the role you just made by finding the + button next to their name.
Awesome! you're all set to move onto the next step.
Setting up your first Discord bot
What is a Discord bot?
A feature of Discord is that it allows us to use bots—these are automated helpers that help run commands for us if we ask them to. Interacting with bots is one of the most fun parts of using Discord! Bots can:
- Help you administrate your server—Automatically assign roles to new joiners, ban people for saying certain words
- Run fun minigames
- Alert you of events happening
- Some bots send messages when bosses spawn in an MMORPG
- On my server with my friends, a bot monitors for when our Minecraft server is up or down and when people are online!
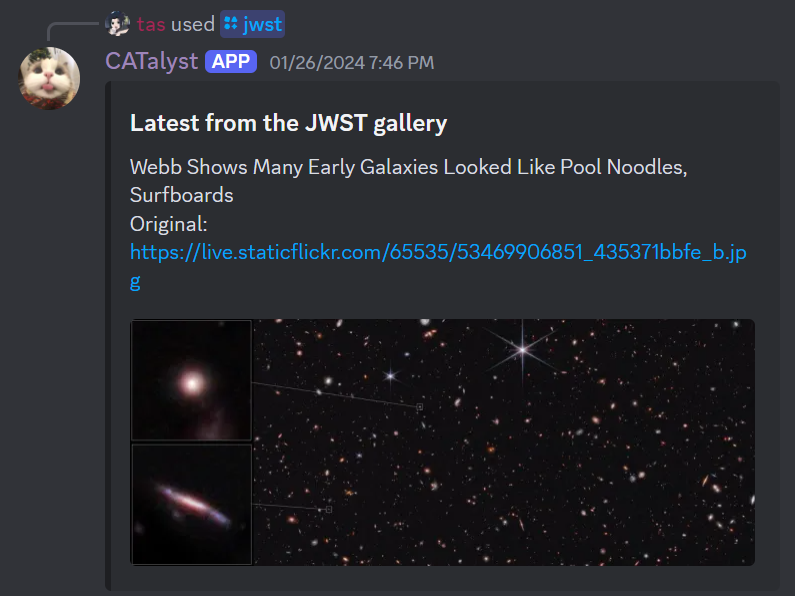
For example, this is a bot I made to give me the latest image from the JWST gallery. By running a simple command, it fetches the image for me and delivers it in a nice little discord message!
Let's go through setting up your own discord bot.
Registering a bot application
First we need to register our application, which is like making an account for our bot.
-
Open the Discord Developer Portal. Login if you need to.
-
Find the applications tab on the top left, and press
new application. Create an application and give it a name.

-
Click on
Botin the left sidebar, then click onAdd Botto create a bot account and bot token. -
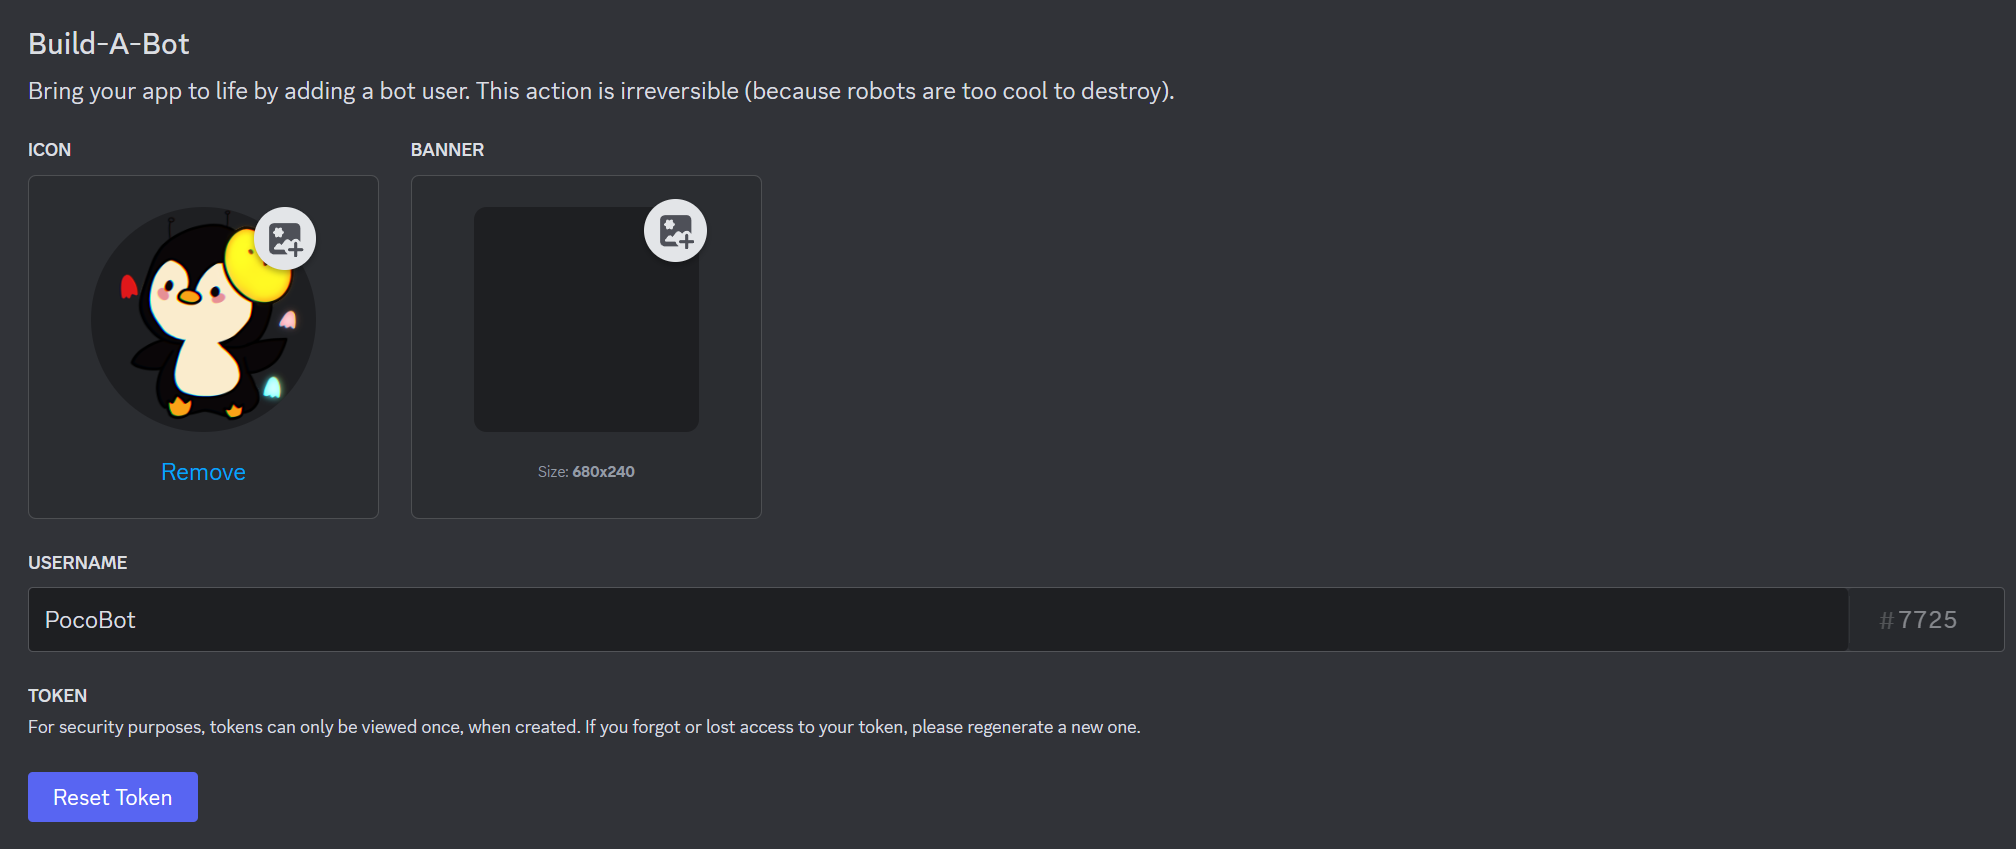
Once your bot is created, you can give it a username and a picture in the
Bottab.
- Go to the
OAuth2tab and tick the following permissions:
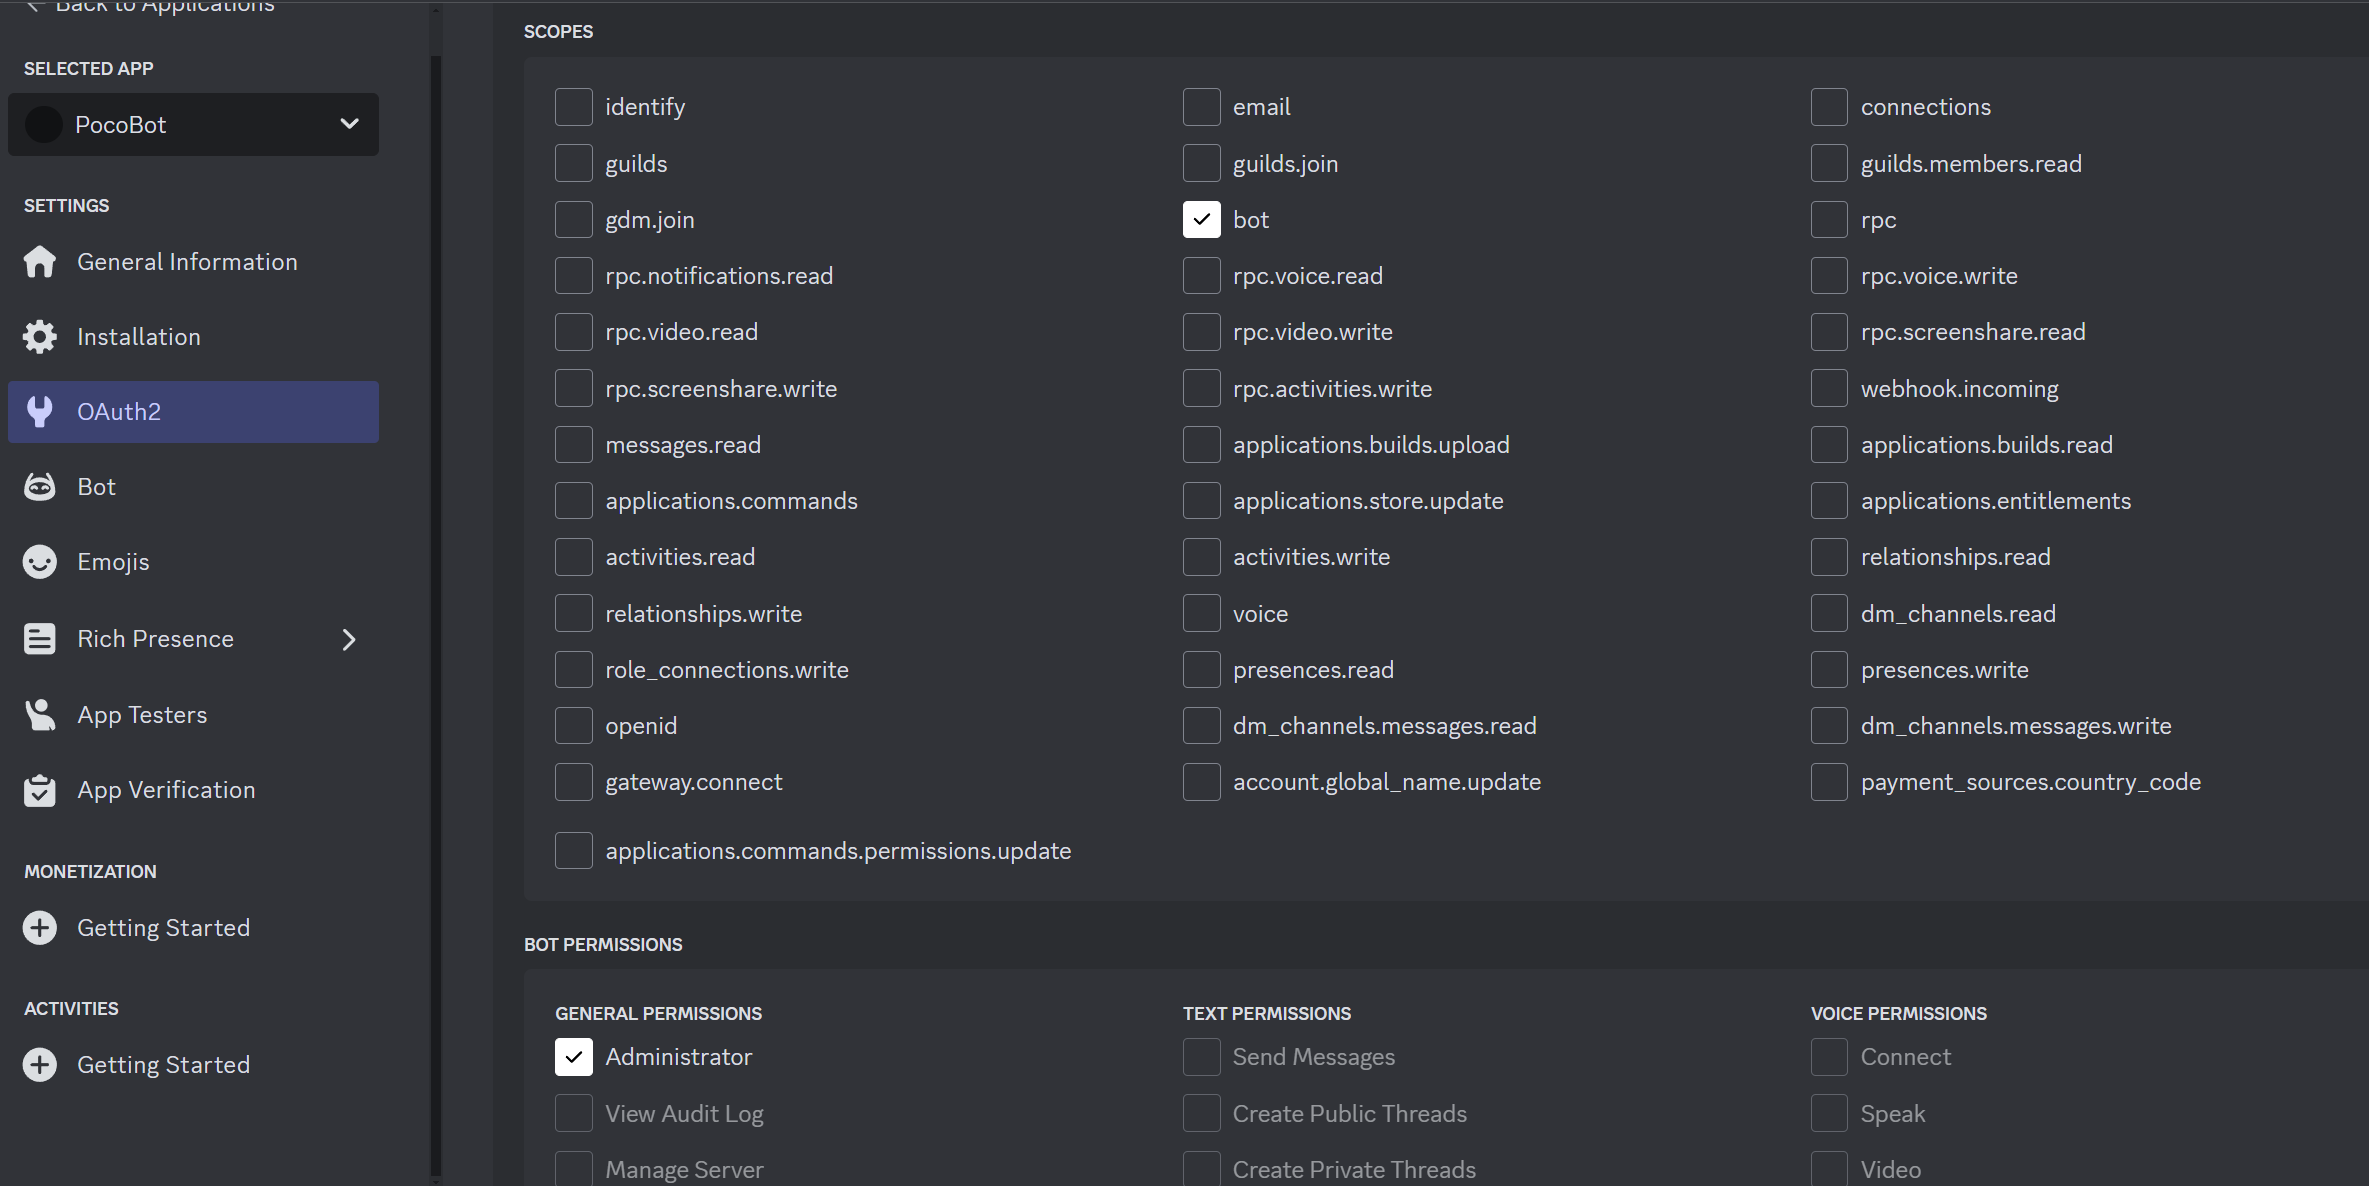
- Copy the link below the permissions tables at the very bottom of the
OAuth2page. Open it in a web browser.

- Select the server you made in the dropdown that shows to add your bot to the server.
You should see your bot join your server with a welcome message. We're done with actually making the bot! Yay!
Adding code to our bot
Go back to the VSCode instance that opened when you logged in. On the left, in the explorer pane, we can see all the files in our project.
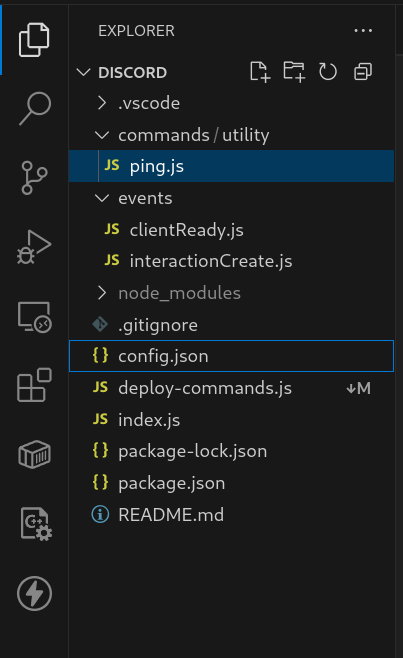
If you can't see that, try hitting CTRL+Shift+E, or going to the menu bar at the top and pressing "View" then "Explorer".
Let's take a look at the files we have in our project so far.
index.js
The index is where our robot will first start working from. The code to setup your bot is mostly filled in for you. You probably will not need to modify this.
deploy-commands.js
Deploy-commands contains the script that your repo uses to register the commands added to your bot. We'll learn more about this file and what it does when we explore the slash command builder, but you can also leave this one untouched for now.
package-lock.json, package.json,
package.json defines the name, version, and importantly, what libraries your project will use.
We will talk more about libraries in a little bit.
For now, you probably won't need to change this, but if you ever want to make your bot more powerful, you might need to modify this.
package-lock.json is a file describing what versions of each library you have installed, and is generated automatically.
You do not need to change this, ever.
.gitignore
Ignore this!
config.json
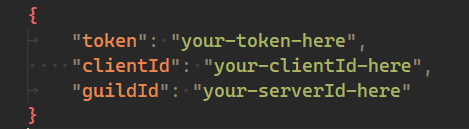
Your config file holds the specific information needed by your bot in particular. To fill in each field:
token:
Navigate back to your bot application in the discord developer portal, and go to the bot tab. Scroll down until you see the reset token button; click this and it should give you your bot's token that you can copy into the config file.
- It's important to note that your token should be kept as private as possible! if you share your token, other people could add code to and access your discord bot. Make sure you only put it into your
config.jsonfile and nowhere else.
be careful with your bot token
If anyone gets access to your token, they can impersonate your bot, and thus you! Never share it with anyone, and store it somewhere private. If you ever upload your code online to a platform like GitHub, make sure you don't distribute your token with it.
clientId:
Navigate to general information on the discord developer portal, and copy the text listed as Application ID. Paste this into your config file.
guildId:
Our coding interface refers to servers as 'guilds'. So, we need to pick which server we want our bot to be able to execute commands in. In your Discord app, right click the icon of the server you just made on the side.
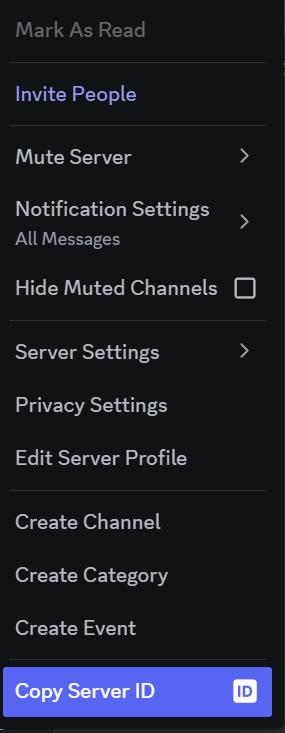
Click on copy server id, and then paste this into the guildid field in your config.json.
Running our bot for the first time.
Now that we've linked our bot to our code using its token, we can try running it!
Inside VS Code, there should be a triangular start button in the top-right corner of the window. Click it to start running the bot!
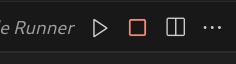
i can't see that button!
Let a mentor know! For now, you can run the bot by:
- Opening a terminal
- Running the command
npm start
Whenever we make a change to our code, the bot will restart automatically, picking up our changes. You can press the square stop button to turn off your bot.
To verify if it started, you can go into your server and look at the member list on the right side - if your bot powered on successfully, it should display under the 'online' category. You should also see a message in the terminal tab at the bottom of your window.
Right now, our bot barely has any functionality! In fact, the only thing it can do is run a command called ping. To try it out, go into a channel of your server and type /ping in the message bar.
Let's give it some functionality!
What is the Discord API?
An API is a set of commands and operations, and instructions for how to encode them and where to send them, so that computers may talk to other computers. Here, the Discord API allows us to communicate with the Discord web servers
There are two key components of the API:
- Gateway events—Your bot connects to the Gateway which is used for real-time communication between your bot and the Discord web servers.
- Discord will alert your bot to things like messages being sent (
Message Create), a user joining a server the bot is in (Guild Member Add), and most importantly, a user performaing a slash command (Interaction Create). - You can read the full list of events on the Developer Portal documentation page or on the discord.js documentation.
- Your bot also needs to send "heartbeats" to the Discord Gateway, to signify that your bot is still online. You don't have to interact with this system though.
- RPC, over HTTP requests—This is the sort of thing you used yesterday. To do things like send a message, your bot will make an HTTP request to the Discord web servers. By sending a request in a certain format, you trigger a remote procedure call or (RPC). Each operation that you do requires creating a separate HTTP connection. Luckily, discord.js will handle that all for you.
There are lots of different applications that can interact with the Discord API, and bots are just one kind. Bots are special because they are an app that gets a user account. That means other users can interact with them like they are a user, such as giving them roles, sending them Direct Messages, and so on. Bot users can be affected by permissions just as human users do. Bots also need to continually indicate that they are online over a connection with the Gateway.
Other kinds of applications might use the Discord API through the Webhooks interface. Those apps do not need to maintain a connection.
You can read all the gorey technical details abotu the API on the Discord Developer Portal.
i don't know what kind of bot to make!
There are lots of websites online that gather lists of bots. Why not invite some to your server? That might give you some inspiration.
Task 1: Creating a Basic /ping Command
We can start by making a command that replies with "Pong!" when the user types /ping.
Code
const { SlashCommandBuilder } = require('discord.js');

module.exports = {
  data: new SlashCommandBuilder()
    .setName('ping')
    .setDescription('Replies with Pong!'),
  async execute(interaction) {
    await interaction.reply('Pong!');
  },
};
Explanation
SlashCommandBuilderis used to define your slash command (/ping).- The
module.exportsobject contains:data: Defines the command name and description.execute: The function called when the command runs.
Task 2: Formatting Bot Messages
Discord.js provides built-in formatting tools to stylize your bot’s messages.
Example
const { blockQuote, bold, italic, quote, spoiler, strikethrough, underline, subtext } = require('discord.js');
const string = 'Hello!';

const boldString = bold(string);
const italicString = italic(string);
const strikethroughString = strikethrough(string);
const underlineString = underline(string);
const spoilerString = spoiler(string);
const quoteString = quote(string);
const blockquoteString = blockQuote(string);
const subtextString = subtext(string);
Combine Styles
You can nest formatting functions for more expressive messages:
const message = bold(italic("This is bold and italic!"));
await interaction.reply(message);
Emphasizing Bot Responses
Use formatting to emphasize context:
await interaction.reply(blockQuote(bold("System Message: ") + "Command executed successfully."));
Or for dramatic or humorous effect:
await interaction.reply(spoiler("Secret message inside..."));
Usage in Commands
To make the reply bold in your /ping command:
await interaction.reply(bold('Pong!'));
You can also:
- Italicize with
italic('Pong!') - Make it a spoiler with
spoiler('Pong!') - Use other formatting methods above
Task 3: Pinging a User
Now we will update the /ping command to mention a specific user.
Updated Command
const { SlashCommandBuilder } = require('discord.js');

module.exports = {
  data: new SlashCommandBuilder()
    .setName('ping')
    .setDescription('Ping a user!')
    .addUserOption(option =>
      option.setName('target')
        .setDescription('User to ping')
        .setRequired(true)
    ),
  async execute(interaction) {
    const user = interaction.options.getUser('target');
    await interaction.reply(`Pong! ${user}`);
  },
};
Explanation
-
addUserOption: Adds a required user input to the command. -
interaction.options.getUser('target'): Retrieves the user selected. -
${user}: Automatically converts to@mention. -
You’ve created a basic
/pingcommand. -
You learned how to stylize bot messages using Discord.js utilities.
-
You enhanced the command to ping specific users.
Events and Listeners
what's an event?
An event is something that happens in your Discord server, like someone sending a message, joining a voice call, or a new user joining. When you want your bot to notice when these things happen, you can use listeners!
listeners = bot ears
Listeners are like the eyes and ears of your bot. They listen for certain events, and when they "hear" one, you can tell your bot to do something, like send a reply or welcome a new member!
tip
All code for events is to be put in its own file, in the events folder.
example
Suppose you want a bot to repeat every message.
import { Events } from 'discord.js';

const name = Events.MessageCreate;
const once = false;
function execute(message) {
  // Prevent the bot from copying its own messages or other bots
  if (message.author.bot) return;

  // Send the same content back to the channel
  message.channel.send(message.content);
}

export { name, once, execute };
Here, Events.MessageCreate is the event, which triggers when someone sends a message in the server.
The value once has been set to false, as we want this event to trigger more than just one time.
If you want your bot to run something only once (the first time only), you can set once to true. An example can be seen in clientReady.js, which prints a message in the terminal once when starting the bot.
possible errors
In the above code, you may get an error "Used disallowed intents". If so, it is likely that your bot is trying to read messages, but is not allowed to by discord.
To fix this, go to the discord developer site for your bot, go to the Bot section on the sidebar, and enable "MESSAGE CONTENT INTENT". Also, in index.js, replace
const client = new Client({ intents: [GatewayIntentBits.Guilds] });
with
const client = new Client({
	intents: [
		GatewayIntentBits.Guilds,
		GatewayIntentBits.GuildMessages,
		GatewayIntentBits.MessageContent
	]
});
there are many events!
Your bot can listen for many events, like messages, member joins, reactions, and more!
Want to see them all? In VSCode, if you type Events. (with the dot), you will see a long list.
Or, you can visit the official discord.js website for more information. In the Events section, each event has a description of how it triggers, and what information your bot will receive.
try this!
Your task is to make your bot react to a message with an emoji 👋 when someone says "hello".
- Create a new file in the
eventsfolder calledhello.js. - The bot should listen to every message
- The bot should be able to run many times
- It should check if a message contains the word "hello", and react to the message if so.
hint
You can check if a message contains a word by checking if message.content.includes('word')
hint
You can react to a message using message.react('👋') (can copy the emoji).
Slash Commands
slash commands
A slash command only appears when starting a message with /.
Instead of having the bot automatically respond to events, slash commands only run when someone uses the slash command.
creating our commands folder
Each slash command should be put in its own file, in the folder utility (found inside commands)
slash command structure
discord.js provides a slash command builder to help us make slash commands.
import { SlashCommandBuilder } from 'discord.js'

export const data = new SlashCommandBuilder()
  .name('some command');
  // can add more information about the slash command

export async function execute (interaction) {
  // do something
}
See ping.js, in commands/utility for a basic example.
important
Every time you make a new slash command, or make changes to an existing slash command, make sure to run node deploy-commands.js.
adding options (inputs) to your commands
use .addStringOption(), addUserOption(), etc. to let users give info to your slash command.
A full list of ways to add information to a command can be found here
example
Here, our command is set to take a string input. The option is called input, has description Text to repeat, and cannot be empty.
import { SlashCommandBuilder } from 'discord.js';

export const data = new SlashCommandBuilder()
    .setName('repeat')
    .setDescription('Give a message to repeat!')
    .addStringOption(option =>
        option
            .setName('input')
            .setDescription('Text to repeat')
            .setRequired(true));

export async function execute(interaction) {
    const text = interaction.options.getString('input');
    await interaction.reply(text);
}
Feel free to try this code!
Welcome to Day 3 of CompClub's winter workshops ☃️❄️!! Today you'll be finishing your discord.js bot and add an AI wrapper to it!
This will guide you through the how to add an AI wrapper to your bot. Complete the tasks at your own pace!
If you have finish everything, there is a small challenge waiting for you in the end!
To get started, press the right arrow button.
useful resources
Day 3 slides links: https://go.compclub.org/winter-day-1 OpenAI Models:
not sure? ask!
Mentors are here to help you! We'd rather you ask a question than be struggling on something for way too long.
Part 1: Make A Direct API Call
revision
In this section, we will revise how to make an API call Link to APIs
tasks
- Create a file called
api-call.jsin visual studio code - Follow the instruction and make an API Call
Calling the API
Define An async Function
info
async means this function can use await inside it.
tip
async function nameOfFunction()
try block
info
- This is where you put code that might fail (we will talk about how to handle the fail in the next section), in this case your API Call.
tip
   try {
       ...
   }
Send A Request to the API
info
fetch(...)sends a GET request to the URL.awaitmeans "wait for the response before continuing."
tips
const response = await fetch('<url of your API>');
Parse the JSON Response
info
The API returns something like:
   {
   "data": ["Response from AI"]
   }
await response.json()reads the body of the response and turns it into a JavaScript object.- The result is stored in the
datavariable.
tips
const data = await response.json();
Print the Response to the Console
info
data.datais an array of facts.data.data[0]gives you the first fact.
tip
console.log(...);
Handling the Error
info
- If
fetchfails (e.g. no internet, server down), the code will jump tocatchand print the error message. - You'll want see a helpful message like:
Something went wrong: TypeError: Failed to fetch
[!TIP]
console.error('Something went wrong:', error);
Running the Program
Call the function
info
- This runs everything we just wrote.
- It will print a random cat fact or an error in the console.
tip
nameOfFunction();
Part 2: Add AI to Your Bots
revision
In this section, we will impletment a new slash command for OpenAI Link to OpenAI Platform
tasks
The /ask command now sends the user’s message to OpenAI and replies with the AI’s response.
Every run may give a slightly different answer!
Create A New AI Slash Command
Now we want to be able to call the Open AI using our Discord bot. Here we will implement a new slash command: /ask.
info
Slash commands let you trigger bot responses using a /command in Discord.
task
- Create a new file called
ai.jsin thecommands/utilitiesfolder. - Create a new slash command for the AI wrapper
tip
import { SlashCommandBuilder } from 'discord.js'
export const data = new SlashCommandBuilder()
 .setName('some command');
 // can add more information about the slash command

async function execute (interaction) {
 // do something

}

export { data, execute };
Connect To AI with API
Install The dotenv package
task
- Run this command in the terminal
npm install dotenv --saveto download the dotenv package - Import the
.envfile ->import 'dotenv/config'
Import the OpenAI API
info
- Install OpenAI by running this
npm install openai - We need the OpenAI library and our API key to make requests. The key is stored in a variable called process.env
tip
import OpenAI from "openai";
const apiKey = process.env.OPENAI_API_KEY
Create the Client
info
The client is how we talk to OpenAI.
tip
const client = new OpenAI({ apiKey });
Send a Request to OpenAI
info
client.chat.completions.create(...)sends a message to the AI.- We use the
gpt-3.5-turbomodel for the basic text responses. (More models you can try: (OpenAI Models)[https://platform.openai.com/docs/models]) - The input message goes inside
messages.
tip
const response = await client.chat.completions.create({
    model: "gpt-3.5-turbo",
    messages: [{ role: "user", content: <Insert prompt here> }]
});
Use The AI Response
Access the AI’s Reply
info
The response object has a nested structure. To access just the text reply:
tip
response.choices[0].message.content
Use a Variable as Input
info
You can store the question as a variable and use it in the API call.
tip
const userPrompt = "What is AI?";

const response = await client.chat.completions.create({
    model: "gpt-3.5-turbo",
    messages: [{ role: "user", content: `${userPrompt}` }]
});
Define an async Function
info
async means this function can use await inside it.
tip
async function askOpenAI(prompt) {
    const response = await client.chat.completions.create({
        model: "gpt-3.5-turbo",
        messages: [{ role: "user", content: prompt }]
    });
    return response.choices[0].message.content;
}
Use the AI Reply in Your Command
info
Replace your original interaction.reply() with a call to your AI function.
tip
const answer = await askOpenAI(userPrompt);
await interaction.reply(answer);
Error Handling
info
Sometimes the API might fail (e.g., no internet, server down).
To avoid crashing your program, use try-catch.
tip
async function askOpenAI(prompt) {
    try {
        // Do Something
    } catch (error) {
        // Do Something
    }
}
Customise Your AI
Right now, the AI is not responding to the text you sent in Discord. Let’s change that by using input from the user.
Add an Input Option
info
To accept text input, we need to add a string option to the /ask slash command.
tip
What method lets you define options in SlashCommandBuilder?
.addStringOption((option) =>
    option
        .setName('...')  // What should we call this input?
        .setDescription('...')  // How will you describe the input?
        .setRequired(true)
)
Read the User Input
info
In the execute() function, we can extract what the user typed using .getString().
tip
Use the name you gave your option in the previous step.
const prompt = interaction.options.getString('...');
tasks
- Use the input from Discord as the prompt for your AI client.
- Where are you currently hardcoding the prompt? Replace that with the
promptvariable you just defined.
🧠 Part 3: Adding Memory to your AI
challenge
CONGRATS! You have just finished a SMART AI DISCORD BOT!!!! Do you want to make you bot even smarter? Do you want your bot to have memory? Check out this challenge!!!
Creating files
Generally, GPT bots have no memory (context), built in. They essentially forget everything you tell it the second that it is finished with your request.
Thus, in this section, we will teach you how to give it a little bit of context by writing each message to a file
creating a file
To write to a file, use the fs module. The fs module provides us with a bunch of functions that allow us to read and write to files, similar to the file() function in python.
Example:
import fs from "fs";

const file = fs.createWriteStream("filename.txt", { flags: 'a' });
By setting the 'a' flag in the createWriteStream, this tells the computer that we want to "append" to the file instead of overwriting it.
This is particularly helpful when we want to continiously write our messages to the log.
tasks
- When your bot starts, create a
writeStreamcalledmessages.txt
Writing to files
In this section, you will learn to write to files in JavaScript.
writing to a file
To write to a file, use the fs module. The fs module provides us with a bunch of functions that allow us to read and write to files, similar to the file() function in python.
Example:
const message = interaction.message;
file.write(message);
Where file is a createWriteStream that was created earlier.
question
We can now write to files, but what event should cause us to do so? What event should happen that would cause us to write our message to a file?
Potentially this could be an event that triggers every time a message is sent...
tasks
- Everytime that a message is sent, call the
file.write()function to write it to a file. - Verify that all your messages that are sent are inside the file.
Reading from a file
In this section, you will learn to read from files in JavaScript.
writing to a file
To read from a file, we cannot simply use the createWriteStream we created earlier, but we have access to this function called readFileSync() that reads in the entire file.
Example:
const data = fs.readFileSync('./messages.txt', { encoding: 'utf8', flag: 'r' });

console.log(data);
the Sync of readFileSync at the end of the function name means that the function is synchronous. This means that the code will wait until the function is done until it moves on with the rest of the code.
question
Now, we should read the user messages before we send our request to our AI API. How might we do so?
Perhaps we should read the messages into a variable messsages in our event handler before we send the request.
tasks
- Everytime that a message is sent to the AI, attach a list of all the messages that the user has sent previously.
- Test that your AI can correctly remember things. For example, if you tell it your name, can it still remember ~2 requests afterwards?